How to Check if Your Phone is Blacklisted in South Africa
Buying a second-hand phone in South Africa can be tricky. One of the biggest risks is purchasing a blacklisted phone. Blacklist phones are blocked from making calls, sending messages, or accessing mobile data. This usually happens when a phone has been reported lost or stolen or if a financed phone has unpaid installments.
Before buying, selling, or even activating a phone, it’s critical to check its blacklist status. In this guide, we’ll show you step-by-step how to check if your phone is on blacklist, the reasons phones are on blacklist, and what you can do if your phone is already on blacklist.

What Does “Blacklisted Phone” Mean
A blacklist phone is a device that has a block from all networks in South Africa.
- Blacklisted phones cannot make calls, send messages, or use mobile data
- The Centralized Blacklist Database (CBDB) keeps track of all blacklisted devices in the country
- Phones are typically blacklist if:
- Reported lost or stolen
- Finance payments is not done
- Involved in fraud
Why Phones Get A Blacklist in SA
Phones are in the blacklist for several reasons:
- Lost or Stolen Phones
- If a phone is not there, the network will add it to the blacklist to prevent misuse
- Unpaid Finance Agreements
- Phones you purchase on contract or via credit that you do not pay off can be on blacklist by the bank or retailer
- Fraud or Illegal Activity
- Phones that are of use in criminal activities or illegally imported will also be on blacklist.
Tip: Always request proof of purchase when buying a second-hand phone to avoid legal complications.
How to Check Your Phone’s Blacklist Status
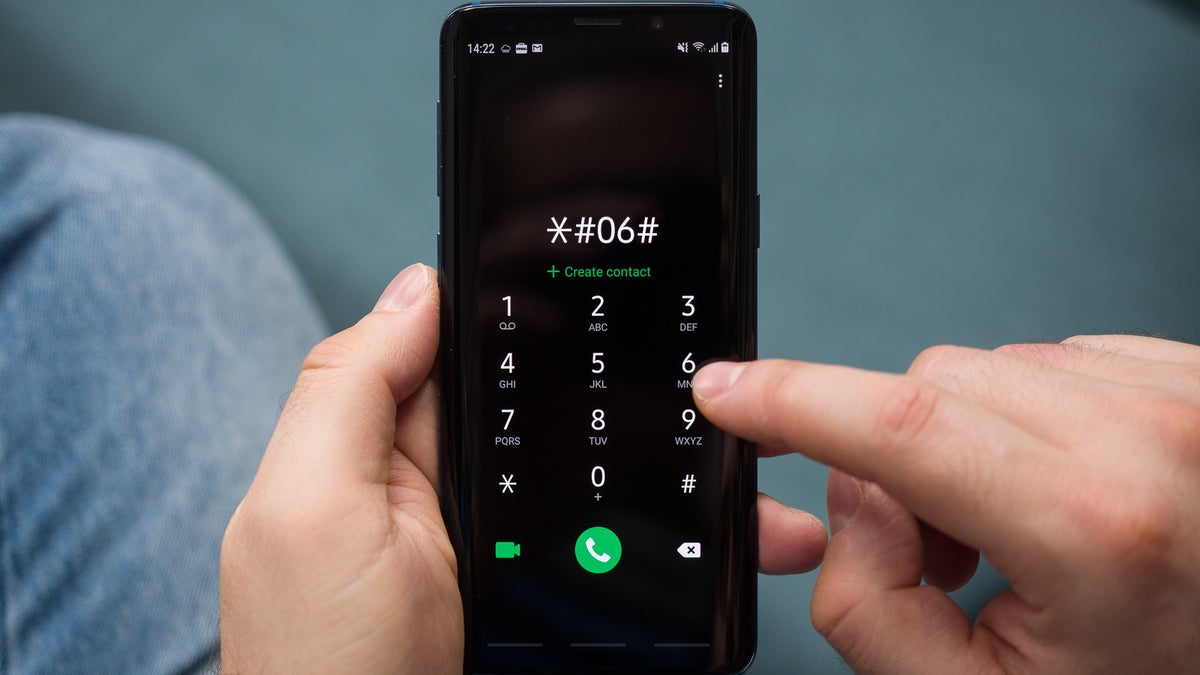
Step 1: Find Your IMEI Number
The IMEI (International Mobile Equipment Identity) is a unique identifier for your phone.
- Dial
*#06#on your phone - The number displayed is your IMEI
- Write it down or save a screenshot
Step 2: Use Official Blacklist Checking Websites
- CBDB Official Tool (https://www.myimei.co.za)
- Enter your IMEI number
- Complete the captcha
- Click “Check”
- Network-Specific Checks
- Some networks allow you to check blacklist status via their apps or portals
- Example: Vodacom, MTN, Telkom
Step 3: Interpret the Results
- Clean: Phone can be of use without issues
- Blacklisted: Phone is on block; avoid using or selling it
- Pending: Verification in progress; wait 24 hours
Alternatives if Your Phone is on Blacklist
- Contact Your Network Provider
- If mistakenly blacklisted, networks can remove it
- You may need proof of purchase and ID
- Return to Retailer
- If recently bought, the retailer may swap or refund the device
- Avoid Using Blacklisted Phones
- Using a blacklisted phone can be illegal in SA
Tips to Prevent Buying a Blacklisted Phone
- Always request a receipt or proof of purchase
- Ask the seller for the IMEI number and check it online
- Avoid cheap deals from unverified sellers
- Purchase from official stores or certified resellers
Common Questions (FAQs)
Yes, however if it was blacklisted in error and finance has although been paid off. Contact the network or bank for verification.
Most official sites and network tools offer free checks.
Sometimes, but it’s risky and generally not recommended.
Typically 24–72 hours once all documents and payments are verified.
Troubleshooting
- Error: “IMEI not found” → Make sure you entered the correct IMEI
- Error: “Pending” → Wait 24 hours; some networks take longer to update
- Error: “Blacklisted wrongly” → Submit proof of purchase to your network
Conclusion
Checking your phone’s blacklist status is essential before buying, selling, or using any device in South Africa. By following this step-by-step guide, you can quickly determine if your phone is clean or blacklisted. Always verify the IMEI, use official checking tools, and never buy devices from untrustworthy sources.
Pro Tip: Keep a screenshot of your clean IMEI for future reference — it may save you from legal trouble or a blocked phone.